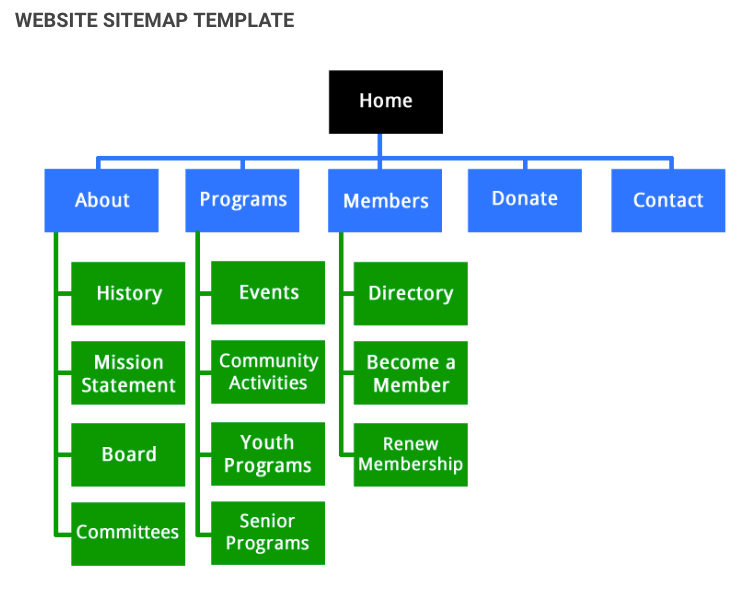
A sitemap is the most important part of a website. So how you can submit your site on google and your website. I am already making a post that how to add site map on google search counsel and today I am going to show you how you can your site map on your website. Well, don`t waste time let`s get started.
Step 1: ( Adding CSS )
Before you edit your website HTML I recommend you please back up your blogger theme.
The First thing you need to do is to login into your Blogger account and go to >> Templates >> Edit HTML and search for the ending ]]></b:skin> tag and just above it paste the following code.
how to search tag on any theme editor
/* ######## Navigation Menu Css by sorabloggingtips.com ######################### */
.mapasite {
margin-bottom: 10px;
background-color: #F8F8F8
}
.mapasite.active .mapa {
display: block
}
.mapasite .mapa {
display: none
}
.mapasite h2 {
background-color: #EEE;
color: #000;
font-size: 15px;
padding: 10px 20px;
border-radius: 2px;
margin-bottom: 0;
cursor: pointer;
font-weight: 700
}
.mapasite h2 .botao {
font-size: 18px;
line-height: 1.2em
}
.botao .fa-minus-circle {
color: #f30
}
.mapapost {
overflow: hidden;
margin-bottom: 20px;
height: 70px;
background-color: #FFF
}
.mapa {
padding: 40px
}
.map-thumb {
background-color: #F0F0F0;
padding: 10px;
display: block;
width: 65px;
height: 50px;
float: left
}
.map-img {
width: 65px;
height: 50px;
overflow: hidden;
border-radius: 2px
}
.map-thumb a {
width: 100%;
height: 100%;
display: block;
transition: all .3s ease-out!important;
-webkit-transition: all .3s ease-out!important;
-moz-transition: all .3s ease-out!important;
-o-transition: all .3s ease-out!important
}
.map-thumb a:hover {
-webkit-transform: scale(1.1) rotate(-1.5deg)!important;
-moz-transform: scale(1.1) rotate(-1.5deg)!important;
transform: scale(1.1) rotate(-1.5deg)!important;
transition: all .3s ease-out!important;
-webkit-transition: all .3s ease-out!important;
-moz-transition: all .3s ease-out!important;
-o-transition: all .3s ease-out!important
}
.mapapost .wrp-titulo {
padding-top: 10px;
font-weight: 700;
font-size: 14px;
line-height: 1.3em;
padding-left: 25px;
padding-right: 10px;
display: block;
overflow: hidden;
margin-bottom: 5px
}
.mapapost .wrp-titulo a {
}
.mapapost .wrp-titulo a:hover {
color: #f30;
text-decoration: underline
}
.map-meta {
display: block;
float: left;
overflow: hidden;
padding-left: 25px;
}
.mapasite h2 .botao {
float: right
}
Step-2 ( Adding HTML Script )
Now, this is the most essential part of the tutorial and you have to do it very carefully. In the template, search for the </body> tag and just above it paste the following HTML Coding.
<script type='text/javascript'>
//<![CDATA[
var text_month = [, "Jan", "Feb", "Mar", "Apr", "May", "Jun", "Jul", "Aug", "Sept", "Oct", "Nov", "Dec"];
var no_image_url = "https://blogger.googleusercontent.com/img/b/R29vZ2xl/AVvXsEj6h20GRaKh6mwpdB4Ue8MPT1V8DRpxmbqlLyGSgV3GWARA__ZnEj5c5o9fzXXfx5ZAnsysyrjbGKAUGsuBYoVze_IOLNM-3Ngdo22z39TG1DDffe2atwyagOPQ59B6Zetl0viDwX3TegI/s1600-r/nth.png";
var static_page_text = $.trim($('.static_page .post-body').text());
if (static_page_text === "[sitemap]") {
var postbody = $('.static_page .post-body');
$.ajax({
url: "/feeds/posts/default?alt=json-in-script",
type: 'get',
dataType: "jsonp",
success: function(dataZ) {
var blogLabels = [];
for (var t = 0; t < dataZ.feed.category.length; t++) {
blogLabels.push(dataZ.feed.category[t].term)
}
var blogLabels = blogLabels.join('/');
postbody.html('<div class="siteLabel"></div>');
$('.static_page .post-body .siteLabel').text(blogLabels);
var splabel = $(".siteLabel").text().split("/");
var splabels = "";
for (get = 0; get < splabel.length; ++get) {
splabels += "<span>" + splabel[get] + "</span>"
}
$(".siteLabel").html(splabels);
$('.siteLabel span').each(function() {
var mapLabel = $(this);
var mapLabel_text = $(this).text();
$.ajax({
url: "/feeds/posts/default/-/" + mapLabel_text + "?alt=json-in-script",
type: 'get',
dataType: "jsonp",
success: function(data) {
var posturl = "";
var htmlcode = '<div class="mapa">';
for (var i = 0; i < data.feed.entry.length; i++) {
for (var j = 0; j < data.feed.entry[i].link.length; j++) {
if (data.feed.entry[i].link[j].rel == "alternate") {
posturl = data.feed.entry[i].link[j].href;
break
}
}
var posttitle = data.feed.entry[i].title.$t;
var author = data.feed.entry[i].author[0].name.$t;
var get_date = data.feed.entry[i].published.$t,
year = get_date.substring(0, 4),
month = get_date.substring(5, 7),
day = get_date.substring(8, 10),
date = text_month[parseInt(month, 10)] + ' ' + day + ', ' + year;
var tag = data.feed.entry[i].category[0].term;
var content = data.feed.entry[i].content.$t;
var $content = $('<div>').html(content);
var src2 = data.feed.entry[i].media$thumbnail.url;
htmlcode += '<div class="mapapost"><div class="map-thumb"><div class="map-img"><a href="' + posturl + '" style="background:url(' + src2 + ') no-repeat center center;background-size: cover"/></div></div><h3 class="wrp-titulo"><a href="' + posturl + '">' + posttitle + '</a></h3><div class="map-meta"><span class="p-author">' + author + '</span><span class="p-date">' + date + '</span></div></div>'
}
htmlcode += '</div>';
mapLabel.replaceWith('<div class="mapasite"><h2>' + mapLabel_text + '<span class="botao"><i class="fa fa-plus-circle"></i></span></h2>' + htmlcode + '</div>');
$(document).on('click', '.mapasite h2', function() {
$(this).parent('.mapasite').addClass('active');
$(this).find('.botao .fa').removeClass('fa-plus-circle').addClass('fa-minus-circle');
});
$(document).on('click', '.mapasite.active h2', function() {
$(this).parent('.mapasite').removeClass('active');
$(this).find('.botao .fa').addClass('fa-plus-circle').removeClass('fa-minus-circle');
});
}
});
});
}
});
}
//]]>
</script>
Now Save your template and go to pages to add a sitemap.
Note :- the widget works on jquery so you have to install jquery plugin if you haven't installed it yet..
Step-3 ( Adding Sitemap In Pages ) - Most Important !!
Now, this is the most essential part of the tutorial and you have to do it very carefully. Go to your blogger dashboard > Pages > Add New Page.
On the new page content after adding the page title and hiding the comments using options, add the following code in the page content area.
On the new page content after adding the page title and hiding the comments using options, add the following code in the page content area.
[sitemap]
Now click publish button and check the published page to see the newly added sitemap widget. ;)

No comments:
Post a Comment